Template Creation
Template Creation
To create a new template, simply click on the "Create templates" option within the templates menu located in the left sidebar of OmniQ.
After accessing the creation screen, a form like the following will be displayed:
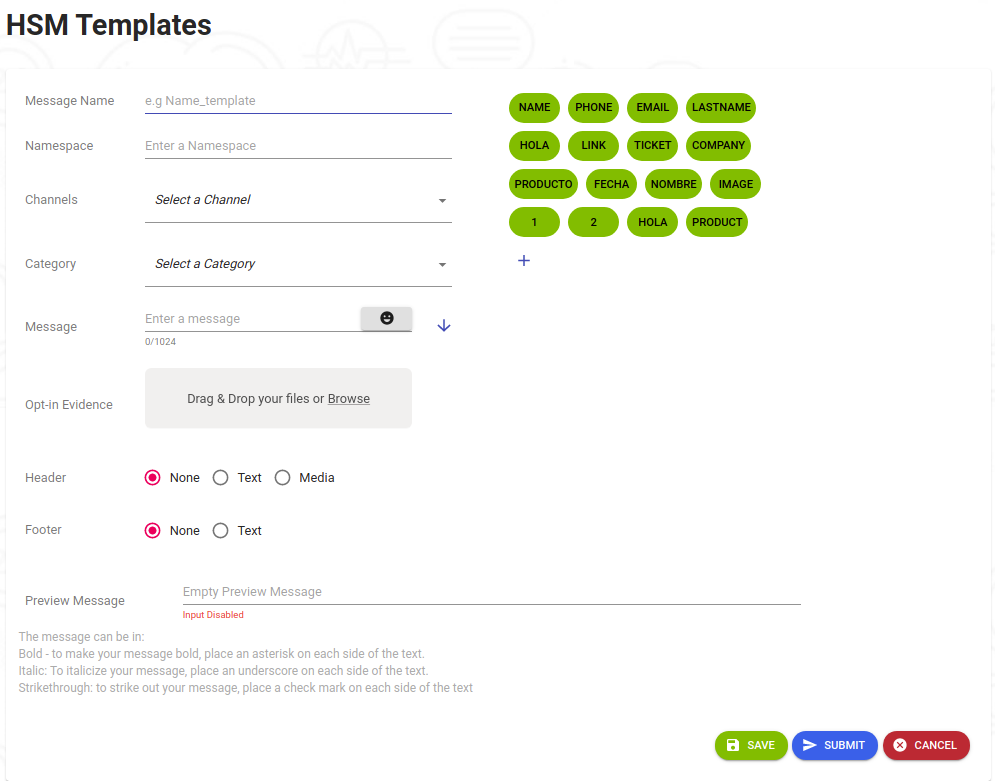
Field Definitions:
Message Name: Template identifier.
Namespace: Refers to the WhatsApp Business account associated with the client's phone number.
Channels: The channel through which the template will be used to send messages.
Category: The type of category under which the message falls.
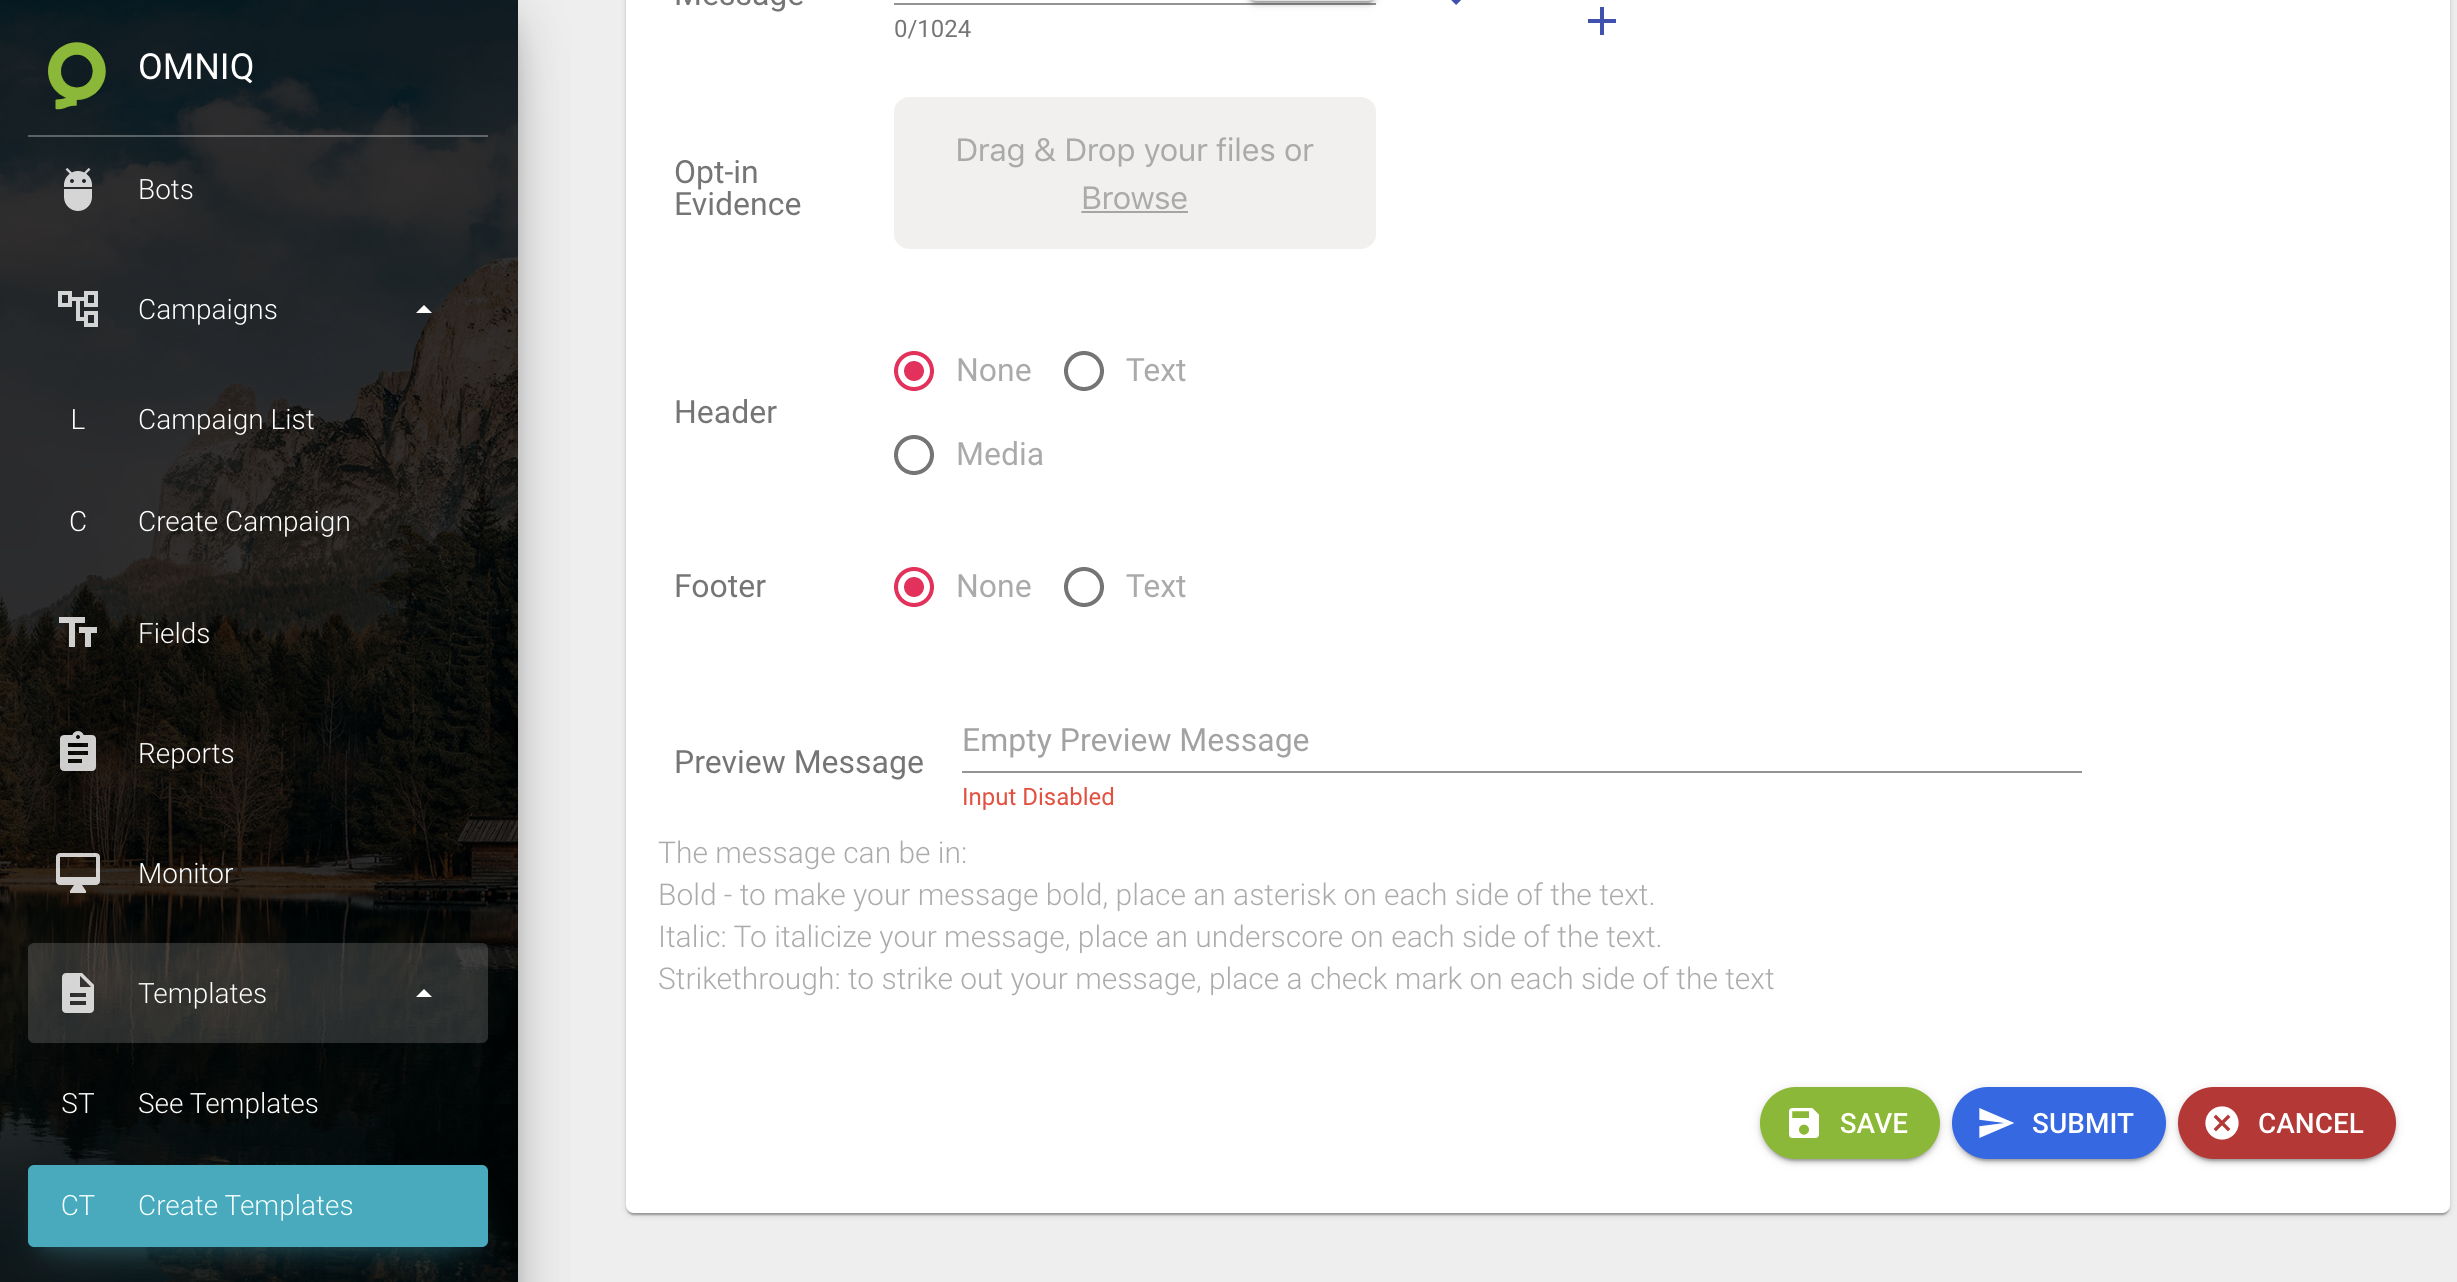
Message: The message that will later be sent to all necessary users. It allows adding any WhatsApp emoji and provides a preview of the final message using the blue button on the right.
Acceptance Evidence: Space to publish proof that the client wants to receive the template message.
Header: Title of the message, where text or multimedia content (image, document, video) can be inserted.
Footer: Bottom section of the message, only accepts text.
Preview Message: Reflects the final message to be sent to users.
After filling in the necessary template information, there is an option to cancel the template using the "CANCEL" button, save it for future modifications with the "SAVE" button, or submit it for approval using the "SUBMIT" button.
