Node Definition
Overview

Skill Transfer
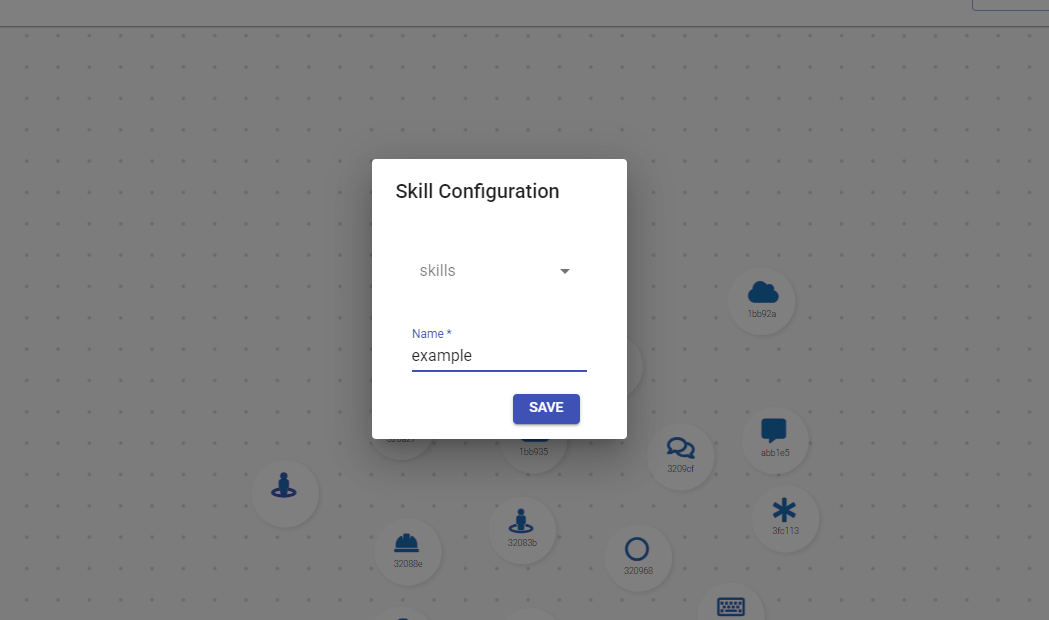
Here we are viewing the Skill Transfer node screen, which includes a field and a selector. Below is an explanation of their functions:
- Skill: The name that identifies the node.
- Name: The identifier of the node.
- Save: Allows storing the skill to be transferred.
📌 For more information, click here.
Message
Here we will add a message depending on our need.
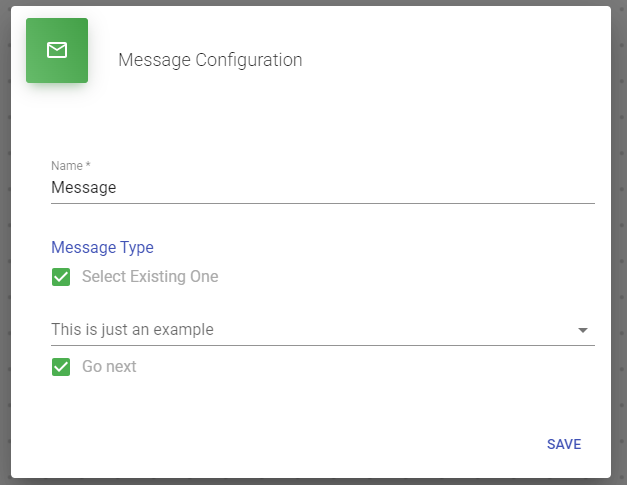
Here we are visualizing the message node screen where we have two fields and a selector. Let's explain what they are for.
Name: This is the name to identify our node.
Message: This is where we will structure our message.
Go Next: It is to give continuation to another message or another bot action. If we deactivate this field, it will stop at this part of the node because with this we indicate that it should stop.
📌 For more information, click here.
Case
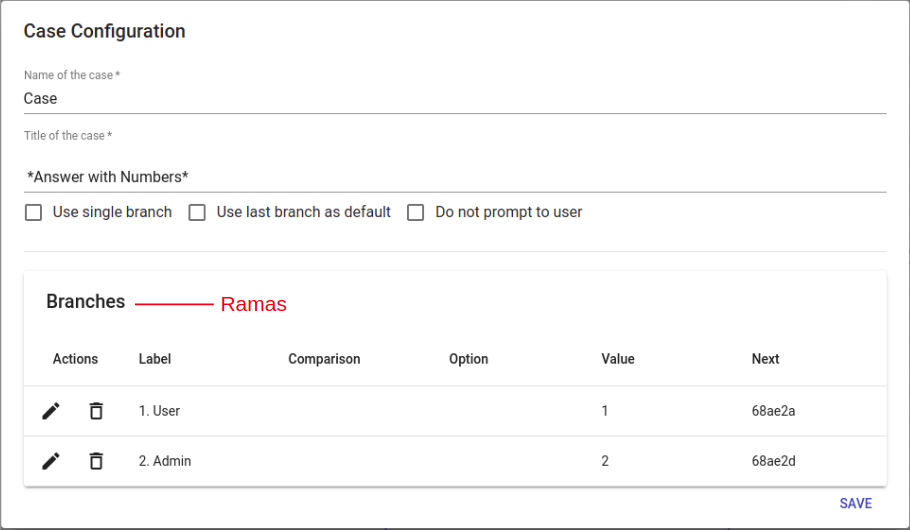
This is where we will add various options for our client to choose from depending on their need.
For example:
📌 For more information, click here.
Case Name: This would be our name to identify the Case.
Case Title: This field would be the message title to provide an introduction or information.
Branching: This is where we will be able to give the client several options to choose from.
Connector
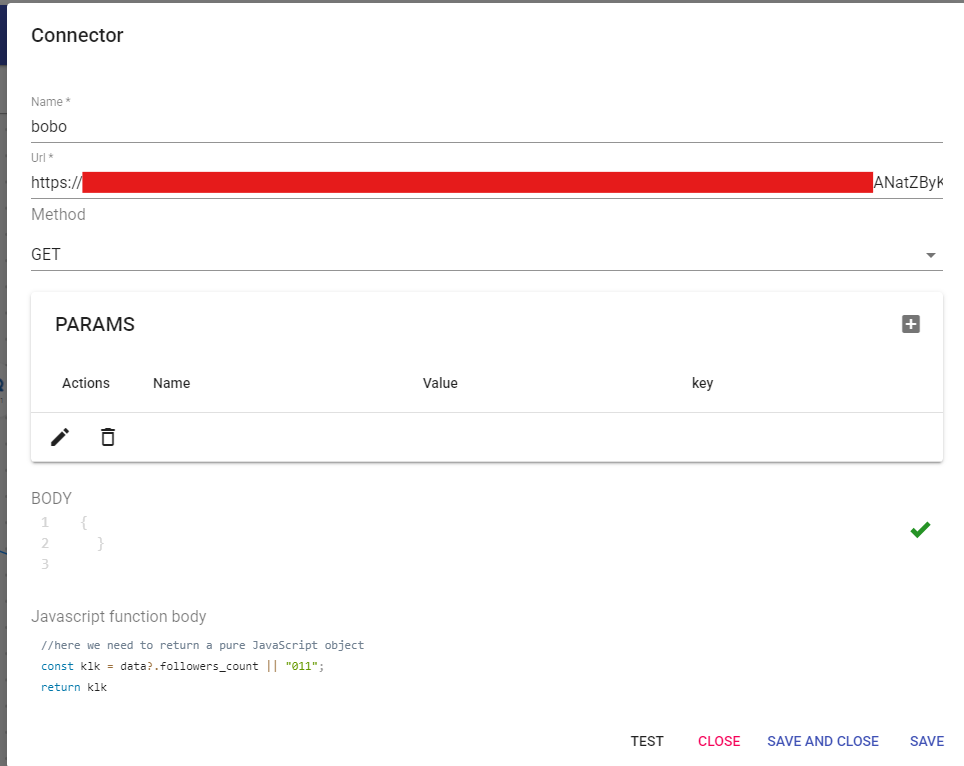
Here we are viewing the connector screen where we have several configurable fields and options. Let's explain what they are for.
Name: This is the name to identify our connector.
URL: Here the URL of the API to which the request will be made is defined. In this case, it is querying the number of followers of an account on Facebook Graph API.
Method: Specifies the type of HTTP request that will be made. In this case, GET is being used to obtain data.
Parameters (PARAMS): Allows adding additional parameters to the request. Currently, none have been defined.
Body: In this case, it is empty because the request is GET, which typically does not require a body.
JavaScript Function Body: Here the API response is processed. In this example, it extracts the number of followers from the response (data?.followers_count) and, if it doesn't exist, returns "011" as a default value.
Action Buttons:
- TEST: Allows testing the connector to verify if the request and data processing work correctly.
- CLOSE: Closes the window without saving changes.
- SAVE AND CLOSE: Saves changes and closes the window.
- SAVE: Saves changes without closing the window.
📌 For more information, click here.
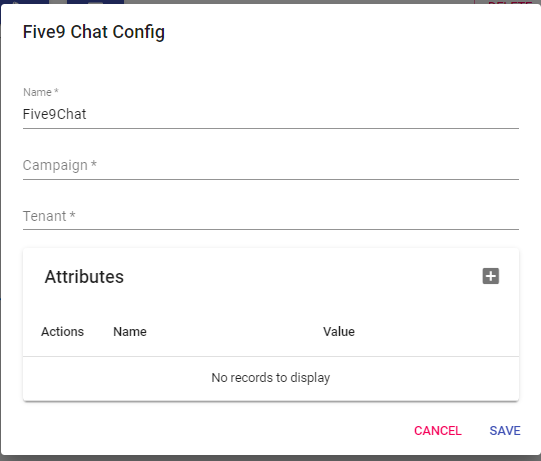
Five9Chat
In this part is where we will make a connection with Five9. As we can see, it asks us to add our campaign and our tenant. The attributes part is where we will send Five9 parameters that we will see later in the explanation of each field.
For example:
📌 For more information, click here.
Field Definitions
Name: Our module name to identify.
Campaign: Here we must add our campaign that we have in Five9.
Tenant: The tenant is the domain we have in Five9.
Attributes: Here we can call variables that we already have defined in our flow. We can use variables defined in Input or Case nodes. Here we will show you an example.
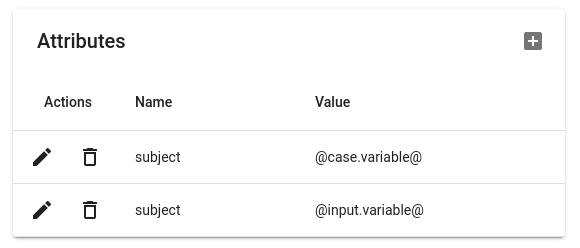
To call the variables, we must add an at sign "@" at the beginning and end, for example: "@case.variable@". Here what we do is call our node and the variable that is within that node.
📌 For more information, click here.
Input
This is where we can store variables to capture information. We can call these variables in the Five9 node.
For example:
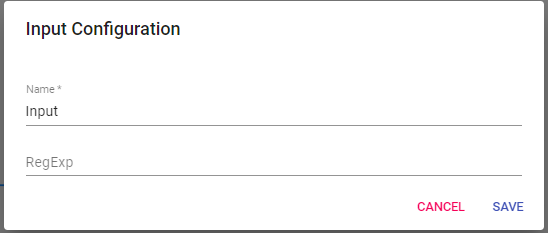
Input Definitions
Name: This will be the name to identify our Input.
RegExp: This field is to add multiple options. When our client types something related to the options implemented in our regular expression, it will redirect to the skill related to the typed option.
Here we can see two options added to our regular expression.
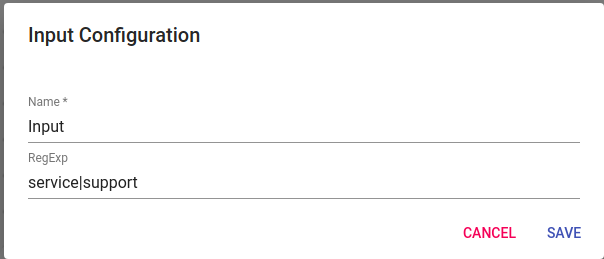
When our client is interacting with our bot, if the client writes one of these options in the chat, it will be directed to a skill responsible for these two areas which would be "Service and Support".
📌 For more information, click here.